
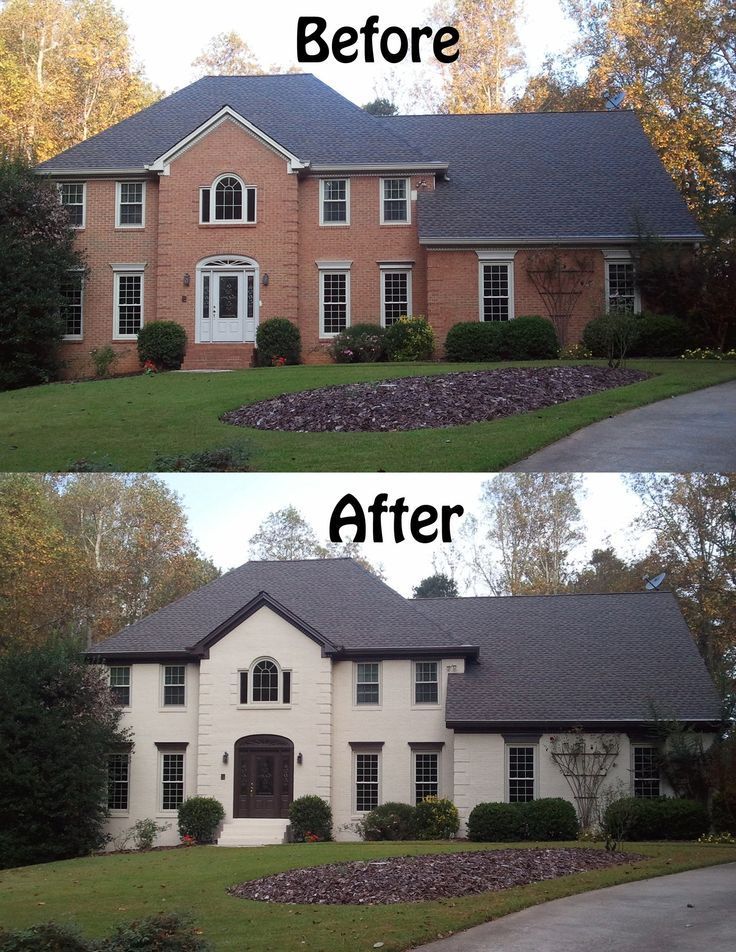
Exterior Painting
USING OUR COLOR CONSULTANT
When you decide to move forward with us on your painting project, we will provide you with the option of using a professionally trained Sherwin-Williams Personal Color Consultant. During the 90-minute in-home visit, your Personal Color Consultant will create a custom color palette that fits your decorating style. You will also receive product and overall project advice that will help give your space a professional, finished appearance.
PREPARING YOUR HOME EXTERIOR FOR PAINT
When you decide to allow BrightSide Painting and Remodeling to put the power of paint to your home’s exterior, here are the preparation steps that we will use to succeed:
Planning For the Weather
Rain can easily ruin a fresh coat of paint and undo hours of hard work, so weather is truly a critical component of a successful exterior paint project. We refrain from painting when the temperature drops below 40°F. We also avoid painting when there are low temperatures or high humidity. Generally speaking, the higher the humidity, the slower a product dries.
Prep Work
CLEAN
Pressure washing your home thoroughly is important. We use water, bleach (or a green alternative) and ladders to prepare all surfaces included in the project ready for paint and/or stain.
DRY
A fully dry substrate is imperative. For decks, we will wait until the next day after the pressure washing to begin painting/staining since a wood substrate will need its moisture content to be below 15%.
DULL
In general, your new paint's adhesion could be negatively affected if applied over existing high gloss surfaces. Fortunately, most exterior houses aren’t high gloss, but many doors are. If we encounter a surface that is high in gloss, we will degloss with sandpaper or a liquid deglosser.
Any existing paint that is peeling will be corrected by smoothing those edges. Sanding provides a smooth surface that improves the adhesion of both paint and primer.
PRIME
All sanded areas and exposed raw wood that are not in sound condition will be spot-primed (applying primer to particular areas). Also, brick surfaces will always be primed prior to painting.
CAULK
Minor cracks and gaps between siding, flashing, windows, doors, and trim will be filled with a high-quality paintable caulk. The smoother your surface, the more uniform your paint job will look.
PAINT
We will begin painting on the side of the house that will remain in the shade until we finish. Direct sunlight can result in paint drying too quickly causing lap marks and blistering.
Typically, siding is sprayed from the top down along with gutters and eaves first (if they are going to match the color of your siding). It may be necessary to backroll after spraying (stucco, for example). Otherwise your fascias, soffits, and gutters (also known as the “overhang”) will be sprayed to match the trim color. Hand-brushed trim such as doors, windows, frames, moldings, and downspouts will be painted last.
USING THE APPROPRIATE PAINT BASED ON SURFACE TYPE
Most acrylic/latex paints will work on the majority of popular exterior home surfaces, including wood siding, brick, fiber cement, stucco and EIFS (Engineered Insulation Finishing System).
As a general rule, UV resistance, which prevents fade, is one of the main benefits that separate the quality of one paint from another. Besides the sun protection, higher quality paints have great expansion and contraction characteristics, resistance to wind-driven rain, mildew and dirt pick-up resistance, and a number of other benefits.
Acrylic/latex paints are generally the best choice for exterior painting projects. Latex paints resist the sun’s rays and are highly compatible with all the substrates mentioned above. They are not as prone to fading like oil-based paints.
Favorite finishes for exteriors include low lustre or satin, as they tend to resist dirt pick-up compared to flatter finishes. Many homeowners opt for semi-gloss for that little pop of shine on the trim, shutters and moldings.
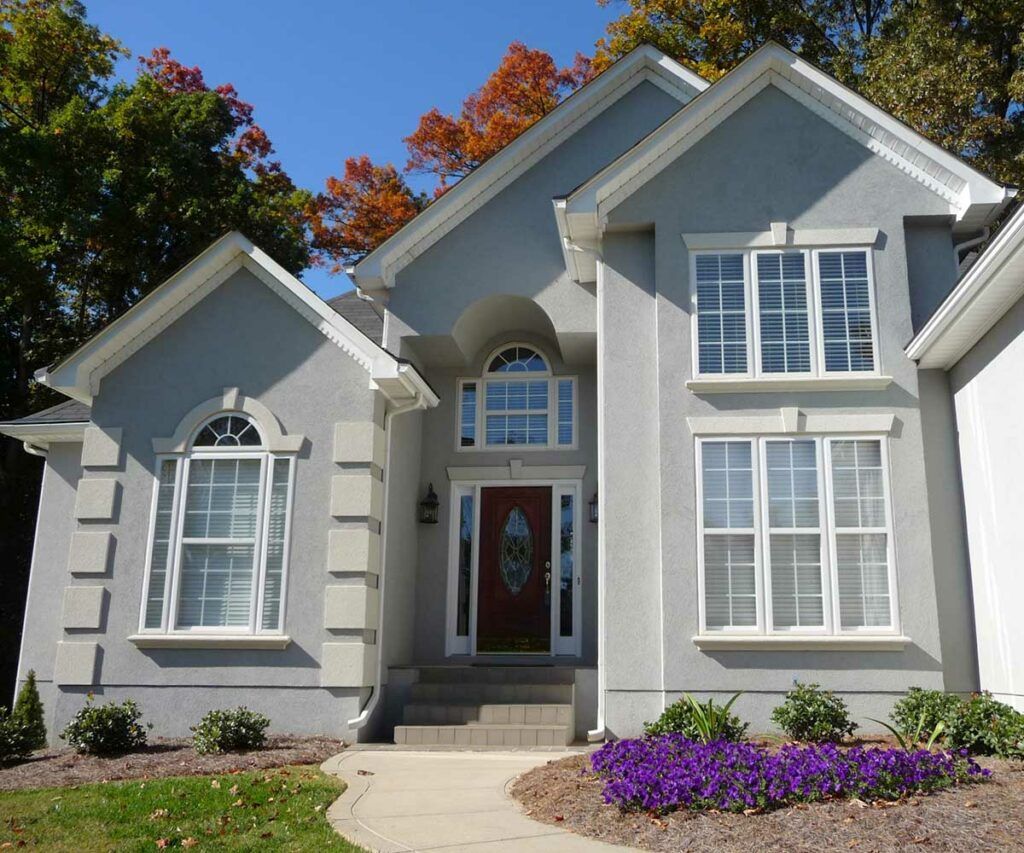
Painting Stucco
The paint colors used for stucco range in shades from natural hues and washed out pink, to blues and custom shades. Painting a stucco home is no more difficult than repainting a home with siding. The most effective paint depends on the condition and age of your stucco, and whether it has been painted before.
Painting New Stucco
If you are buying a new home with stucco or decided to add a stucco exterior to your existing home, new stucco needs to be cured for at least 60 days before painting. After the stucco is cured, use a water-based sealant specifically formulated for use on stucco and masonry surfaces. This application can then be followed with multiple layers of water based paint. Some inexpensive paints designed for exterior use are a combination of latex and acrylic, so be sure to get one that is 100% acrylic. This type offers the very best adhesion and retains color better than other kinds. As with any type of paint project, using the highest quality paint will prolong the life of your paint.
Stucco That Has Been Painted Before
Stucco that has been previously painted should first have all loose paint, dirt and debris removed. We will pressure wash first to prep the surface area. The stucco can then be repainted with acrylic or elastomeric paint. If you are changing from a dark paint to a lighter color, consider using a primer to help minimize any bleed through onto the new coat.
Painting Old Stucco
One of the most important steps with older stucco that has faded is to make sure and complete all repairs and seal cracks before applying the new paint. The entire surface should be pressure washed and two coats of acrylic paint or elastomeric paint should be applied. If the stucco seems to be “soaking up” the paint, then add an extra coat or even two to ensure it will stand the test of time.
Stucco Paint Colors
Selecting the right color for your home is the next step. Keep in mind that the most popular bold colors of Georgia will be much different than the most popular colors elsewhere. The overall top stucco colors across the US are:
- Pewter with off white trim
- Pale gray with bright white trim
- Warm beige with light beige trim
- Natural linen with light trim
If you’re unsure of what type and color to use on your stucco home, ask your color consultant and she should be able to help you choose.
Painting Exterior Brick To Modernize Your Home
Painting brick has always been a topic of controversy among home décor and architectural enthusiasts – some more purist folks out there feel that it’s defacing. It is the sort of job that might well get you even more unsolicited advice than other household maintenance jobs.
Painting bricks is much more complicated than that of painting flat interior walls. We will begin the process by pressure washing the entire exterior of your house to remove any mold or dirt, which could significantly compromise the integrity of the paint job if painted over. After this, we will repair and prime all of the brick and mortar with high-quality primer, as well as possibly caulk any parts that might let water through. The primer will be tinted to ensure that the final coat color is best represented.
Staining Cedar
Cedar siding may require significant prepping and multiple applications depending on how weathered it has become. A quality stain must be applied properly to ensure a uniform finish that protects against peeling and mildew. Effective penetration results in excellent color retention and will enhance appearance and texture for great curb appeal.
DECK STAINING AND PAINTING
A freshly painted deck can transform your backyard by adding color and curb appeal to your home, but thinking about the process of how to stain (or restain) wood can be daunting. How many coats of stain do I need? What if the wood is weathered or peeling? Does application change depending on the type of wood?
Wood Conditions
Wood remains the most common choice for decks. More expensive hardwoods such as mahogany or ipe offer gorgeous grain and texture that shine through when using a transparent or semi-transparent stain. Softer, less expensive woods, including pressure treated southern yellow pine or cedar, benefit from the natural weather barrier provided by a semi-solid or solid stain.
Wood alternatives known as “composite decking” are also a popular choice. While often sold as maintenance-free, components of composite decks demand protection from color fading as well. Staining or painting your deck railings may be a solution to consider.
Understanding the Opacity
When it comes to the impact the stain will have on your deck’s design, understanding opacity is key. Opacity is the degree to which you can see the natural grain of wood, achieved by using one of the following:
Clear
stain has no color added and shows the natural beauty of the wood.
Translucent
stain doesn’t obscure grain and texture of wood and includes just the slightest tone.
Semi-Transparent
stain allows most of the grain and texture to show through, with slightly more prominent color.
Semi-Solid
stain, with its deeper shades, covers most imperfections while allowing some of the grain and texture of the wood to show through.
Solid
stain offers the greatest color depth of all, covering the majority of imperfections while allowing the texture of the wood to peek through lightly.
Color Consideration
For a more monochromatic look, use a similar shade as your house’s primary color. This is a good choice if you want to feature your fire pit or dining area as the deck’s focal point.
Another technique that will make the deck stand out against the siding color of your house for a unified look that still highlights your deck’s architecture is to stain it the same color as the trim of your home.
Using Quality Products
We will apply a product that resists scuffs as well as the growth of mildew and algae on the coating’s surface. It is important that the stain is capable of blocking tannins and has outstanding color retention.
REPAIRING YOUR HOME
If left unchecked, rot could slowly be compromising the integrity of your home’s wood. Fortunately, wood rot can be controlled if detected early and treated effectively. Common areas where rot occurs are:
- Window sills
- Trim around doors and windows
- Exterior wooden doors (including garage doors)
- Decking, including posts and railings
- Roofs and eaves
- Areas around gutters and downspouts
- Siding at base of home and under leaking gutters
What Causes Rotten Wood?
If wood is untreated, moisture is the enemy. If a porous wood surface comes in contact with enough water for enough time, the result is usually some kind of deterioration. This could be caused by leaks, flooding or excessive rain or snow.
What is the Difference Between Wet Rot and Dry Rot?
As the name indicates, wet rot (also called white rot) occurs when water permeates untreated wood. As the moisture seeps from the outside in, the wood becomes weak. Dry rot (also called brown rot) is a fungus that also starts with moisture, but can live and grow inside the wood even after it’s “dried out.”
What is the Difference Between Rot and Dry Mold?
Mold is related to rot, in that it is fungi that grow from moisture. While there are health risks associated with a mold problem, mold doesn’t directly cause wood decay.
Detecting Rot
Rot can often be detected just by looking at and touching the wood. A discoloration or spongy feel usually indicates wet rot. If areas of the wood are split across the grain into cube-like sections, you probably have dry rot.
Wood rot should always be addressed as soon as possible. Not only does it continue to get worse, but over time it can even make your structures unsafe. BrightSide Painting & Remodeling offers complete carpentry services including interior and exterior trim & rot repairs, and we will coordinate this phase of work with your painting project. In many instances we will replace areas of rot with decay-resistant materials such as PVC or Hardie products.
For example, re-siding with fiber cement is a smart investment in your home. Fiber cement costs less than wood, doesn’t attract pests, and resists water absorption to help resist damage from mold, swelling and cracking—buying you more mileage for your dollar. Also, since fiber cement siding (unlike vinyl) is non-combustible and hail-damage resistant, it can sometimes help reduce home insurance premiums.
James Hardie siding products come with a 30-year, non-prorated limited warranty and trim products come with a 15-year, non-prorated limited warranty.
Have a Time-Sensitive Project?
We're available 12 hours a day, 6 days a week.
Professional Painting and Repair Estimates
Professional Consultation
Schedule your free estimate online, call, or have us call you back to get on our calendar at your earliest convenience.
Complimentary Estimate
An estimator will visit your project site to measure and assess what your project will require, then provide you with a detailed estimate of our proposed solution.
Schedule Your Painting Project
E-sign the proposal and get scheduled for a time that is convenient for you to have the work completed.
